Showing posts with label card workshop. Show all posts

Tuesday, May 6, 2014

Stamp a Stack


Are you ready to get a lot of cards made at once? Let me show you how to put together 16 cards using just a few sheets of paper.

Start with 3 sheets of paper. A two sided piece of pattern paper and two pieces of coordinating cardstock. I used the Skylark paper pack-- Skylark paper, lagoon, and colonial white. You will also need 16 card bases. Instead of cutting your own, use the colonial white value pack.

Now it is time to cut!


Very important to pay attention to the dimensions. I start with a cut straight down at 5 1/2 inches. Set up eight piles on your table. Put all the 1's together, all the 2's, and so on.


Cut the lighter color of cardstock (Colonial White in my case) at 5 1/2 inches. Save the rest of the sheet. You will be using it for embellishments.

I used lagoon for my dark cardstock. Again my first cut was down the page at the 5 1/2 inches mark.

One thing that I noticed using this template several times-- if I didn't cut it exactly as directed, I was able to make it work. I just changed the card slightly and everything looked great. It really isn't an exact science.

Now we are ready to put it all together. I used 4 stamp sets:
Love Life
Joyful Birthday
Big Hug
Funky Blossom

You can use any stamp sets that you have on hand. You need a few sentiments and a few icons.

Besides the paper, card bases, and ink, I also used Lagoon Ink, a sponge, and 3-D foam tape.

Time for the cards!

 Card 1
Patterned paper (PP) 2" x 5 1/2", 1/4" x 5 1/2"
Dark Cardstock (D)  2 1/2" x 5 1/2"
Light Cardstock (L) 2' x 1 1/4"

Tear the larger piece of patterned paper. Use the sponge to ink all the edges. Of course, inking edges is a personal choice. Some people hate it. Some love it. For me, it depends on my mood.

Each card will be made twice. I turned the Skylark paper over and then changed the stamp used so that I ended up with 2 different cards for each.


Card 2

PP 5 1/4" x 2, 4 1/4" x1 1/4"
D   5 1/4" x 2, 4 1/4" x1 1/4"
L 3 1/2" x 2"

I think this is my favorite of the pack. I do tend to like a lot of paper so the card with the most paper will of course be my favorite.


Card 3

PP 5 1/2" x 1 1/2"
D   5 1/2" x 1/2", 2 3/4" x 2"
L    2 1/4" x 1 1/2"


Card 4

PP 1" x 5 1/2"
D   1/2" x 5 1/2", 2" x 2"

Here is where you will use the extra light colored cardstock to create an embellishment. Or you can always use something out of your stash.

I stamped the star, cut it out, and used 3-D foam tape to pop it up.
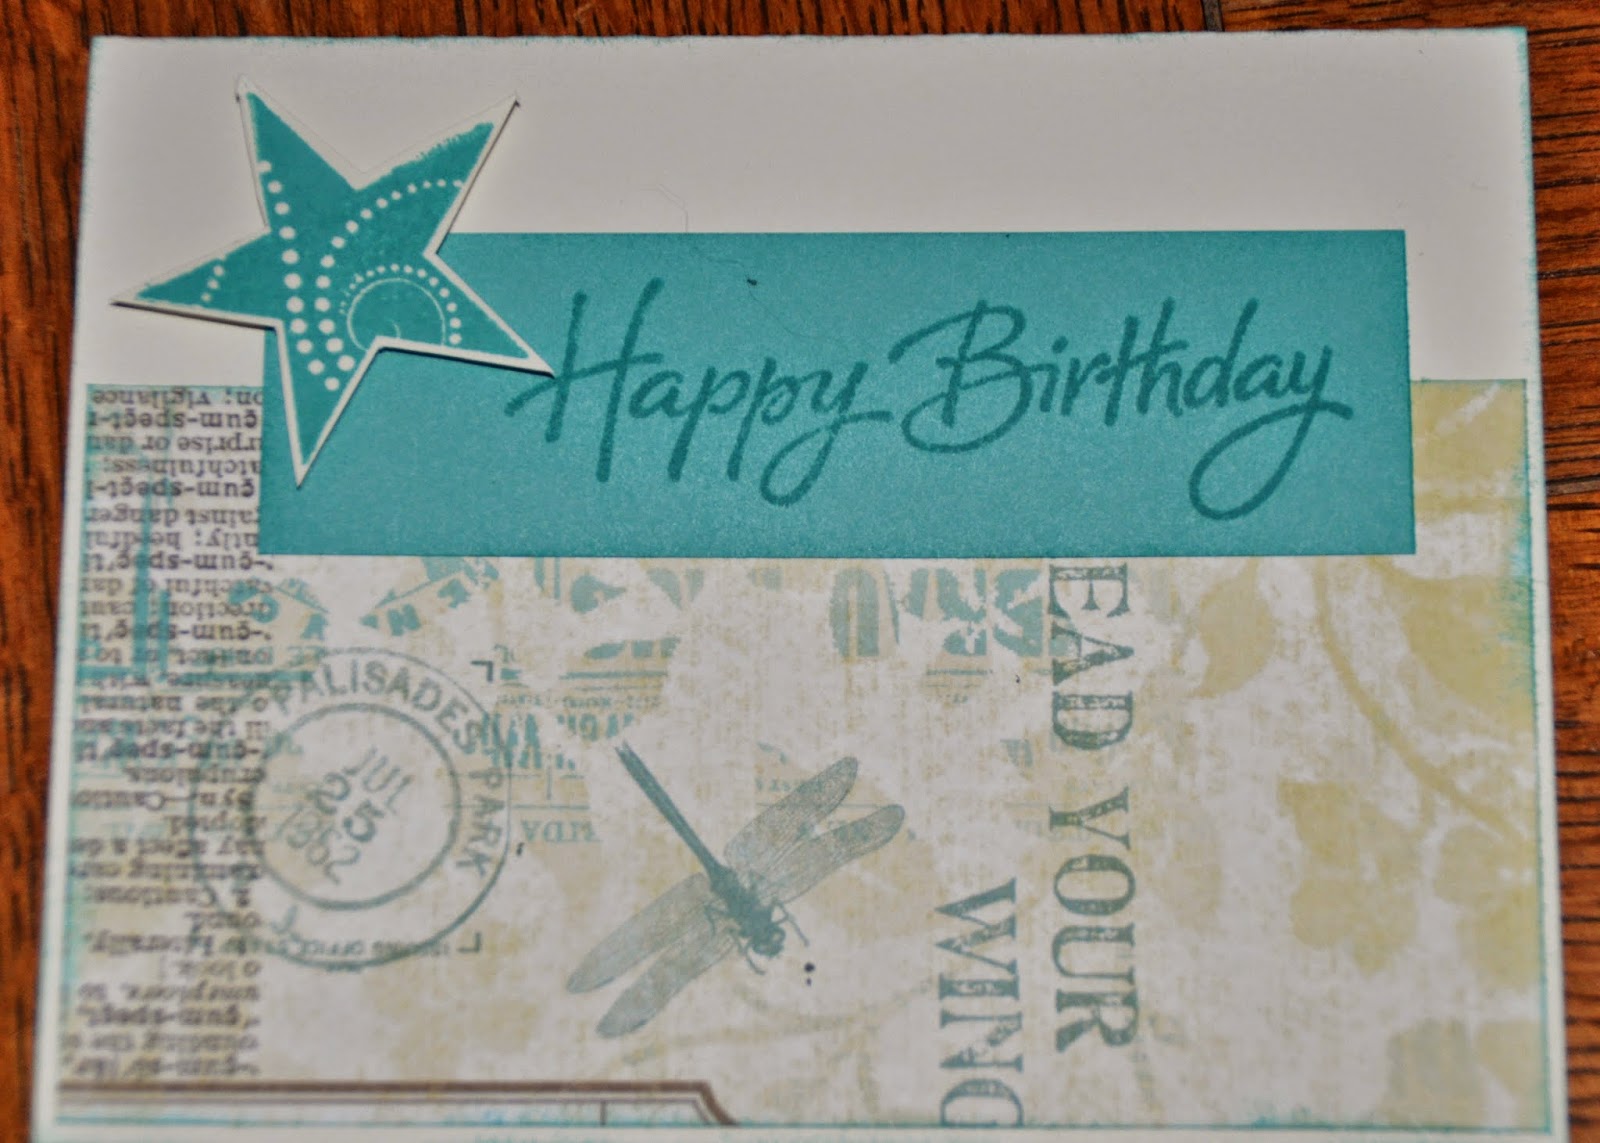

Card 5
PP 2 1/4" x 5 1/4" (note that this page doesn't go all the way to the edge of the card)
D 1 1/4" x 4 1/4"

And add another embellishment


Card 6

PP 1/2" x 4 1/4"
D   3" x 2 3/4"
Embellishment


Card 7

PP 2" x 4 1/4"
D   3 1/2" x 2 1/4",  1/4" x 4 1/4"
L    2 3/4" x 1 3/4"


Card 8

PP 2 1/2" x 1 1/4" (this stripe looks like a different piece but it is the little stripe on the Skylark paper-- it just happened to be that little piece)
D   2" x 1 1/4"
L    1/2" x 5 1/2" (Since this is a Colonial White strip on a Colonial White card base, I sponged it with a little lagoon ink and then put a pattern on it.
Embellishment

You can always add more accents -- a little bling here and some shimmer trim there. Maybe a ribbon or two.

This program is from the Wishes Card Confidence Program. It takes a few minutes to figure out the cuts, but after doing it once, you will be able to pick it up again quickly. You can use any paper and any set of stamps. Give it a try and have some fun with paper today!

Friday, March 7, 2014

Ariana Card Workshop

Earlier this week, I taught a card workshop featuring the Ariana paper pack. The hostess requested the Look to the Light stamp set which is  a series of Biblical passages. I kept the cards simple since most of the ladies attending were beginners to card making. And I am happy to report, the workshop was a success. Everyone had a great time and are excited about making more cards.


I used the Artiste cartridge to make a card holder. Perfect ending for the workshop.

Ariana Paper Pack

Words of Comfort Stamp Set
Look to the Light Stamp Set


Supplies:
Ariana Paper Pack
Daisy White Value Pack Cards
Look to the Light Stamp Set
Words of Comfort Stamp Set
Outdoor Denim Ink
Crystal Blue Ink
Slate Polka Dot washi tape 
Outdoor Denim Chevron Ribbon  
Silver Shimmer Trim 
Black and Grey Epoxy Bubble 
Trinkets Wooden Shapes 
Sponge
Liquid Glass 
Bonding Memories Glue
3-D Foam tape 
Artiste Cricut Collection

Find these supplies at my website at cathryn.ctmh.com.

Have fun with paper!

Friday, January 17, 2014

Sarita Fun

 Had some fun playing with the Sarita Paper Pack at my workshop last week.


For this birthday card, I used the Cricut Artbooking Cartridge to make the cuts. All the cuts are done using the "happy" button which is described on page 86 of the Artbooking booklet. The stack of presents was cut at 8 inches. This card is a standard 4 1/4 by 5 1/2 card. But the Artbooking cartridge is set up to adjust to a scrapbook page. When I put in the size at 8 inches, the machine adjusted the stack to look right on an 8 inch scrapbook page.  So, I put in the Sarita paper. Set it at 8 inches, pressed "icon" and "happy," and cut. Do not remove the paper. Leaving the mat right there were the cut was made, I pressed the "flip" button. Size is the same at 8 inches. Then I pressed "icon," "shift," "happy," and cut. Since the Sarita paper is two sided, I was able to cut the stack of presents with one side of the paper and the layering on the presents with the other side. Pressing the flip button made things quicker and I knew it would match perfectly. 

The "birthday" is cut on Lagoon paper at 1 inch. But this time I pressed "REAL SIZE DIAL" on my Cricut. If I didn't, the machine would think I was making a tiny, little book and birthday would come out minuscule. 

After the cuts, I just quickly put the card together. I used colonial white value pack cards as a base and pieces of colonial white and outdoor denim as well as the Sarita orange. All of which come in the Sarita Paper Pack. As a final accent, I used a couple blue epoxy bubbles.


This is a quick card. I cut "Hello" in Outdoor Denim paper using the Cricut Artbooking Cartridge. This was cut at 1 inch using the "real size Dial" feature. The small background is Colonial white paper stamped in a second generation of lagoon ink using the Distressed Background stamp. Second generation stamping is when the stamp is inked and stamped on scratch paper before stamping on the cardstock. This technique gives it a softer look. The print in the back is Sarita. I added a little bakers twine and popped up the hello with a little 3-D foam. 


The edges of this card are sanded all the way around. I use a sanding block with a piece of chipboard under the paper to give it a little stability while I am sanding. The stamp is from the Casual Expressions set. The wood piece is from the Sarita Assortment. The wood pieces are not backed with an adhesive. Best to use something strong such as liquid glass to adhere the wood.  


Always find ways to use the scraps from your used paper. I cut a few hexagons out of scraps for this card. The edges are inked with Outdoor Denim ink which I think gives it a more finished look. The orange strip on the bottom is a piece of that extra strip that is cut from the 12x12 sheet when it comes out of the package (I always find something to do with those). And the last strip is washi tape! Love washi tape. It is so easy and so economical to use.  The stamp set is For A Friend.


Lastly, I have a gift box. This was cut with the Artiste Cartridge. This box was cut at 4 inches but will use an entire 12x12 piece of outdoor denim cardstock. This box is found on the "7" key which is described on page 37 of the Artiste booklet. 


The Sarita paper pack is a fun pack to play with. This pack is not one being discontinued at the end of the month, but will carry over into the next Idea Book. I am looking forward to playing with it a bit more.

Friday, February 8, 2013

Crazy for Cards Event!


Crazy for Cards!

Time to get your card stash all stocked up! Never have a card ready when you need it? Not after this class!!  Plus, you’ll even learn a couple of card making tricks while you’re at it.  Be prepared for any occasion after you leave this event.  You’ll make a total of 15 cards with envelopes for birthdays, weddings, sympathy, babies, graduation and thank yous.

Date: Saturday, March 23
Time: 11:00 am – 5:00 pm
Cost: $45 (bring favorite adhesive; all other supplies + snacks & lunch included)
RSVP & Prepay by: March 2
Location:  Sunnyvale, near 101 & 237


**Cancellation Policy–you have 48 hours after payment for a full refund up until the RSVP deadline; after this time, you have the option of a kit OR to sell your spot to a friend.**


Thursday, January 3, 2013

La Belle Vie Card Workshop


Join me on January 12 to make this card and others at my La Belle Vie Card Workshop. From 10-noon, I will be in Fremont and from 3-5 in Oakland. We will make 2 valentines, 1 birthday, and 1 everyday card from the La Belle Vie paper pack. Plus we will make a goodie holder. The cost is just $10. Sign up today.

Friday, October 19, 2012

Christmas Card Workshop Coming Soon

Ready to start making your Christmas cards? If you do a lot, like me, it's best to make them in November. Early December, you then are able to write your notes and mail them out, having more time for holiday fun.

With that in mind, I am starting Christmas card workshops just next week. I have one on October 28 and one on November 9. I'll be happy to bring the workshop to you if you would like to host a day for you and your friends. During the workshop, we will be making 15 cards- 3 each of 5 designs.

I have had a lot of fun playing with my paper, trying to decide which designs to use in the workshop. Close To My Heart offers so many holiday stamp sets and I love the Pear and Partridge paper pack. Plus using the Cricut allows for even more options. Time to get my fingers inky and figure out what I want to do.

Here is a card that I made as part of the Heart 2 Heart Challenge:


The base is a 6x6 kraft die cut card which gives you a different look to the card. When the card is opened, there is a large area for my family picture and Christmas letter. It was a quick card to make, thanks to the Artiste Cricut cartridge. The only disadvantage of sending this card out is that I will need extra postage since it is a square card. It is 65 cents to mail a square envelope. But since that is the only disadvantage, I have decided that this card is a yes for the workshop and probably a yes for my family cards.

Supplies:
Kraft Die Cut Cards (Z1474)
Pear and Partridge Paper Pack- using green print, cashmere, and cranberry (X7162B)
Merry and Bright Stamp Set (C1510)
Cranberry Ink (Z2116)
Red Sparkles (Z1326)
Cricut Artiste Collection (Z1790)

Have fun playing with paper today!

Wednesday, October 3, 2012

More Halloween Cards

I attended a Close To My Heart meeting the other day where I took part in a Moonlight Paper card swap. My card was the 3x3 ghost card I posted the other day. Here are a few that I received


This card by Sue Rodriguez. I just love it. Supplies used were the All Hallows Eve stamp set (C1362), black tulle ribbon (Z1798) and Sparkles- brown and tan assortment (Z1754).


C.C. Marsh used the Cocktail Alphabet (E1015) for this card. The cat on this card is an eraser bought at a dollar store. What a great idea!


Joyce Lau (http://createwithjoyce.blogspot.com/) always has a wonderful card to share. In this one, she used the Artiste Cricut Cartridge (Z1790). The cat can be found on page 76 of the Artiste booklet.  The sentiment is from Perfect Fit- Halloween stamp set (B1413).


This last one is by Linda Sturdivant used the Artiste Cricut Cartridge (Z1790) to cut the card base. Check out page 52 of the Artiste booklet for all the card base cutout ideas.

Want to try out a few Halloween cards? I will be holding a Fall Card Workshop on October 11 for just $10. Email me (cathryno@gmail.com) if you are interested in signing up.

Monday, September 3, 2012


I am hosting a card workshop during the day on September 13. I have had several people ask about a daytime workshop but have never had a lot of luck with them. Well, I thought I'd try it out again for a few months and see what happens.

On September 13 at 10:00, please join me at a Flirty paper card workshop. Cost is just $10 for 4-5 projects including the above card. Workshop is in the Fremont area. Email me today (cathryno@gmail.com) if you are interested.