Showing posts with label Frosted paper pack. Show all posts

Thursday, January 9, 2014

Mini Album with My Girl Scouts

Last weekend part of my Girl Scout troop was over for a sleepover. We had a great time. I have been a Leader for almost 20 years. In all that time, I think sleepovers have been the favorite event for all the different groups that I have led. A lot of food, movies, crafts, a little bit of work, and a whole lot of laughter. It is the perfect activity for teen age girls.

The girls are working on the Mission Sisterhood Journey which is one of the awards for Girl Scout Seniors. The girl leading this section of the book suggested that we make friendship albums and asked me to teach an album class. Well, I got out a ton of paper, the Cricut, stamps, inks, embellishments. They were shocked at how much I had. Every time one would wonder if something would be good on her page, I pulled it out and said try this. Our short activity ended up being three hours long. I was amazed at how beautiful the albums were. One of the girls did calligraphy in hers. WOW!

Here are a few pictures of my daughter's book. She isn't finished but it is a very nice start.


She cut the Frosted paper on the cricut using the Artbooking cartridge. We used 6x6 kraft cards as covers and then made the pages 5x5. The album is bound using binder rings (or book rings) that are found at any office supply store. By the way, these 6x6 kraft cards are on while supplies last for just $2 for a set of 6. ORDER NOW!


All the pictures are wallet sized so they fit easily in the mini album.


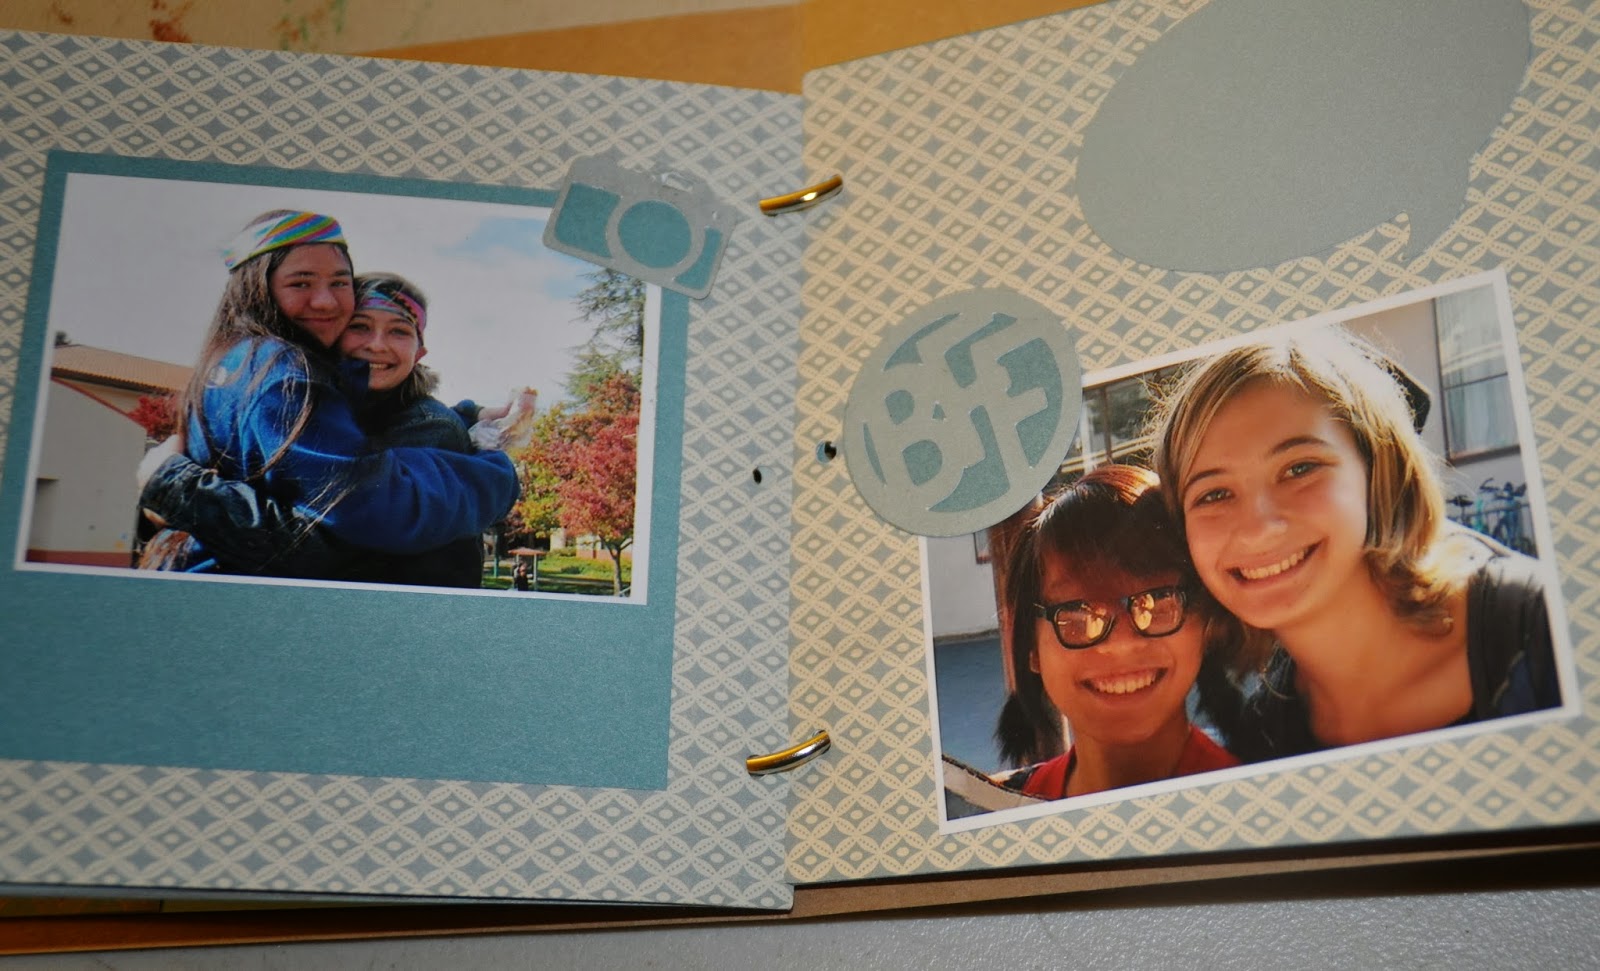
Cait loves the blues of this paper pack so it worked out really well. I think her favorite color to craft with is Twilight. She is always asking for that. 

I do love mini albums and am so happy to have taught a new generation this fun craft. In a couple of weeks I will be teaching other Girl Scout Leaders how to make mini albums with their girls. I will be taking this one with me as an example. 

Have fun with paper today!

Sunday, October 27, 2013

Holiday Cards Using Frosted Paper

Here are 2 more cards from my Holiday Card workshop on Friday. Both use the Frosted Paper


I cut Twilight paper 8 1/2 x 4/1/2 (scored at 3 inches) and 7 x 3 (scored at 3 1/2 inches). I cut the Frosted paper 5 1/4 x 4, 2 3/4 x 4, and then 3 1/4 x 2 3/4 twice. The final piece was a 1 inch circle punch in Frosted. I stamped using twilight ink and the stamps from the Frosted card kit. The circle is adhered with 3-D foam tape so the paper can tuck underneath and hold it closed. I finally accented with a few bitty sparkles

It is really easy to put together once you figure out the dimensions. 

I'm thinking about doing something like this for my family Christmas card. I can add a wallet size picture on one inside flap and a quick family update on another. Then have everyone sign right in the middle.  


This is a quick and easy card using Frosted  and Ruby paper. The Noel is cut from the Artiste Cricut Cartridge. The tree is stamped in slate ink using a tree from the Always Grateful set. The card base from the Colonial White Value Pack. Add a little Glitz at the top for the star and we are good to go.

Are you planning on your Christmas cards yet? Or is it still too soon? I plan and plan and yet don't actually make them until the end of November or early December. I seem to like the planning stage more than making them all in bulk. 

Hope you have time to craft today. Be sure to have fun with paper at every opportunity.

Monday, August 12, 2013

Christmas Layout Using Artbooking


This beautiful layout was created by fellow consultant, Mary Wood, using the Artbooking Cricut cartridge. It is amazing what this cartridge can do with its over 700 cuts. The Frosted paper is cut at 11 inches-- including the photo mats and title. The cartridge automatically scales everything to the perfect size for that page. To make this layout for a 6x6 album, set the size for 6 inches and not worry about it. All will be the same as above, just smaller. But you need to be careful if you are making individual elements. Cutting an 11 inch photo mat, would mean turning on the real size function on your Cricut.

Your scrapbooking pages will be brought to a new level with Artbooking. And it is so quick and easy!

Sunday, August 11, 2013

Another Great Expo!

The Santa Clara Expo is now in the books. I had a great time. A few years back when I started my Close To My Heart business, Expo scared me. I stood in the corner of the booth wondering what I should do. At this Expo, I was so excited to see so many people I knew. I was greeting people, talking about projects, laughing with other vendors. At the end of the day, I was tired-- really tired-- but really happy too. I was wonderful to see all my friends and customers. I enjoy my Close To My Heart business. I get to play with paper and ink and visit with so many friends. Expo is just one part of it.

Our booth had three great make and takes over the two days of Expo.


For my make and take, we made a 4 1/4 square card.  I cut the goldrush paper using the new Artbooking cricut cartridge at 4 1/4 inches. The strips of paper under the overlay is the Sarita paper and I used the All In the Details stamp set. The flower accent is an acrylic flower from the Base and Bling Teal Jewels set.  Other items used are outdoor denim and colonial white paper and cotton candy and lagoon inks. This card was really quite easy to put together. The part that took the longest was cutting the overlay. The Cricut takes a few minutes to cut out such intricate cuts. Make sure that you have a sharp blade and turn your speed down to the slowest setting when cutting something like this. 


This gift tag was Mary Wood's  make and take. She used the Cricut Artiste Cartridge to cut out this tag out of the new Frosted paper pack. The stamp set is the Perfect Fit- holidays and the accent is a small flourish.


Jeanette Matthews made a fun treat card for her make and take. This uses the Pro Player paper pack and the stamp set in the ProPlyer Scrapbooking kit. Jeanette added a treat cup with a pull tab to reach those treats without destroying the card.  This is the card opened. 


Such a fun card. I will be trying this with a card soon.

All in all, Expo was a great success. I wish I had the energy to attend the crop last night but I really just needed to go home, see my kids, and go to bed. Today, I am up and ready to play with paper.