Hope you have time to play with paper today!
Friday, February 28, 2014
Close To My Heart New Paper Packets
I have been crazy busy with workshops and volunteering with Girl Scouts (cookie time!) and running the book fair at our local school. I have been getting a little bit of time in to play with my paper but not enough. Hopefully next week I will post daily with all my latest creations.
In the meantime, take a look at this video for inspiration. It shows all the new paper packs in the current Idea Book. So many options to choose from.
Hope you have time to play with paper today!
Hope you have time to play with paper today!
Friday, February 14, 2014
Organizing Your Paper Crafts
I always have the problem of not being able to find that one thing I want to use for a specific project. Sometimes when preparing a class, I know I would like to use a specific stamp or paper, but I just can't find it. Then there are times that I am working on a layout and can't find that perfect piece of paper or embellishment to complete it. I go to a scrapbook shop or order something in my catalog to complete the layout. Some time later I discover I already own that piece and just couldn't find it! Having less supplies would be easier but I wouldn't be happy. I need to find a way to be able to know where things are at any time. If I can just grab what I want quickly, I will be much less stressed and much happier with my paper crafting.
I have been working in my craft room to make it a little more user friendly. This has been a long process and I am no where near done. But I am making progress. Right now I am working with the Close To My Heart organizers to fix my stamps.


The small organizer is just 2 inches tall. But the other dimensions are the same as the large organizer so it can stack. I have this one filled with pigment ink squares using the foam insert designed for that purpose. There is also a foam insert for blocks which will be the next one I buy. I must note that having all 40 colors right in front of me makes me happy. It is just beautiful. I love ink.


I hope I have inspired you to organize your craft supplies. I'm no where near done organizing my craft room, but I am getting there. Knowing where everything is will help me have a lot more fun with my paper.
I have been working in my craft room to make it a little more user friendly. This has been a long process and I am no where near done. But I am making progress. Right now I am working with the Close To My Heart organizers to fix my stamps.
The large organizer holds up to 40 stamp sets. I have them divided by themes (Christmas/Winter, Fall, Valentine, Spring, Summer, Alpha, Birthday, Everyday life, Flair, Sentiments, Flowers, Nature, Camping/Scouts, Calendar). Now they are easy to find. The organizer is able to close and keep out the dust. Plus it is clear so when I am looking for a stamp it is easy to see inside. The organizers all stack together perfectly.
The small organizer is just 2 inches tall. But the other dimensions are the same as the large organizer so it can stack. I have this one filled with pigment ink squares using the foam insert designed for that purpose. There is also a foam insert for blocks which will be the next one I buy. I must note that having all 40 colors right in front of me makes me happy. It is just beautiful. I love ink.
The medium organizer is perfect for Picture My Life or Project Life cards. This is my friend's set. She is in the process of putting all of her cards in the medium boxes. The medium organizers fit the cards perfectly.
This video by Taniesa Vlasak shows how to organize your Project Life cards in a way you will be able to find them. Taniesa has inspired me to use my organizers more efficiently.
I hope I have inspired you to organize your craft supplies. I'm no where near done organizing my craft room, but I am getting there. Knowing where everything is will help me have a lot more fun with my paper.
Thursday, February 6, 2014
Teen Layouts Using Artbooking
I love the 10 Things key on the Artbooking cartridge. This video shows how to use it with ease and style.
And a picture of the layout:

And a picture of the layout:
You can find a lot of info on this video at Jeanettelynton.com.
I have been thinking about different layouts I want to make using this 10 things button.
10 places I want to visit
10 people who have influenced my life
10 things I will change this year
10 things I love about me
10 things that make my day
The Top 10 Things about our vacation
10 things I want to do with my kids before they go away to college
The list goes on and on. What list would you like to create?
Recipes (click here to purchase items for this layout)
10 Things I Love Layout:
D1580 My Acrylix™ Catch You Later
D1555 My Acrylix™ All the Details
B1449 My Acrylix™ Scribble Banners
X7180B Balloon Ride Paper Packet
X7179B Ariana Paper Packet
X7177B Skylark Paper Packet
Z1935 Black & Grey Epoxy Bubbles
Colors used: Sorbet, Sweet Leaf, Juniper, Colonial White, Black, Slate, Bamboo
Giggles & Grins Layout:
Z1906 Cricut®Artbooking Collection
D1571 My Acrylix™ Sweet & Lovely
X7177B Skylark Paper Packet
X7180B Balloon Ride Paper Packet
Z3000 Skylark Assortment
Z1934 Flamingo Dots
Colors used: Outdoor Denim, White Daisy, Smoothie
Dream Card:
Z1906 Cricut®Artbooking Collection
B1439 My Acrylix™ Dreamer
X7183B Lollydoodle Paper Packet
Z1920 Gold Polka-Dot Washi Tape
Z1935 Black & Grey Epoxy Bubbles
Colors used: Sweet Leaf, Crème Brulee, Smoothie, Cocoa
Colors used: Sweet Leaf, Crème Brulee, Smoothie, Cocoa
Monday, February 3, 2014
Picture My Life
Close To My Heart has a new scrapbooking system called Picture My Life. If you are a fan of the Project Life system, you are going to love the Picture My Life system.
Each system design comes with:
44 – 4" × 6" Cards (2 each of 22 designs)
78 – 3" × 4" Cards (3 each of 26 designs)
1 – 12" × 12" Designed Cover Sheet
10 – 12" × 12" Memory Protectors™ (various designs)
For the first page of my 2014 album I used the one 12x12 memory protector that comes in the pack (I have started with the Later Sk8r pack). I cut the Designed Cover Sheet and used a sheet of Outdoor Denim as a base.


Sorry for the glare. It is really tough to take a decent picture with memory protectors on.


Here is an up close picture of one of the journalling cards in use.
The pack is filled with so many fun cards! I can't imagine using all of them. I am planning to make a few cards out of them as well.

Just one more way Close To My Heart is helping you have fun with paper. Give it a try today!
Each system design comes with:
44 – 4" × 6" Cards (2 each of 22 designs)
78 – 3" × 4" Cards (3 each of 26 designs)
1 – 12" × 12" Designed Cover Sheet
10 – 12" × 12" Memory Protectors™ (various designs)
For the first page of my 2014 album I used the one 12x12 memory protector that comes in the pack (I have started with the Later Sk8r pack). I cut the Designed Cover Sheet and used a sheet of Outdoor Denim as a base.
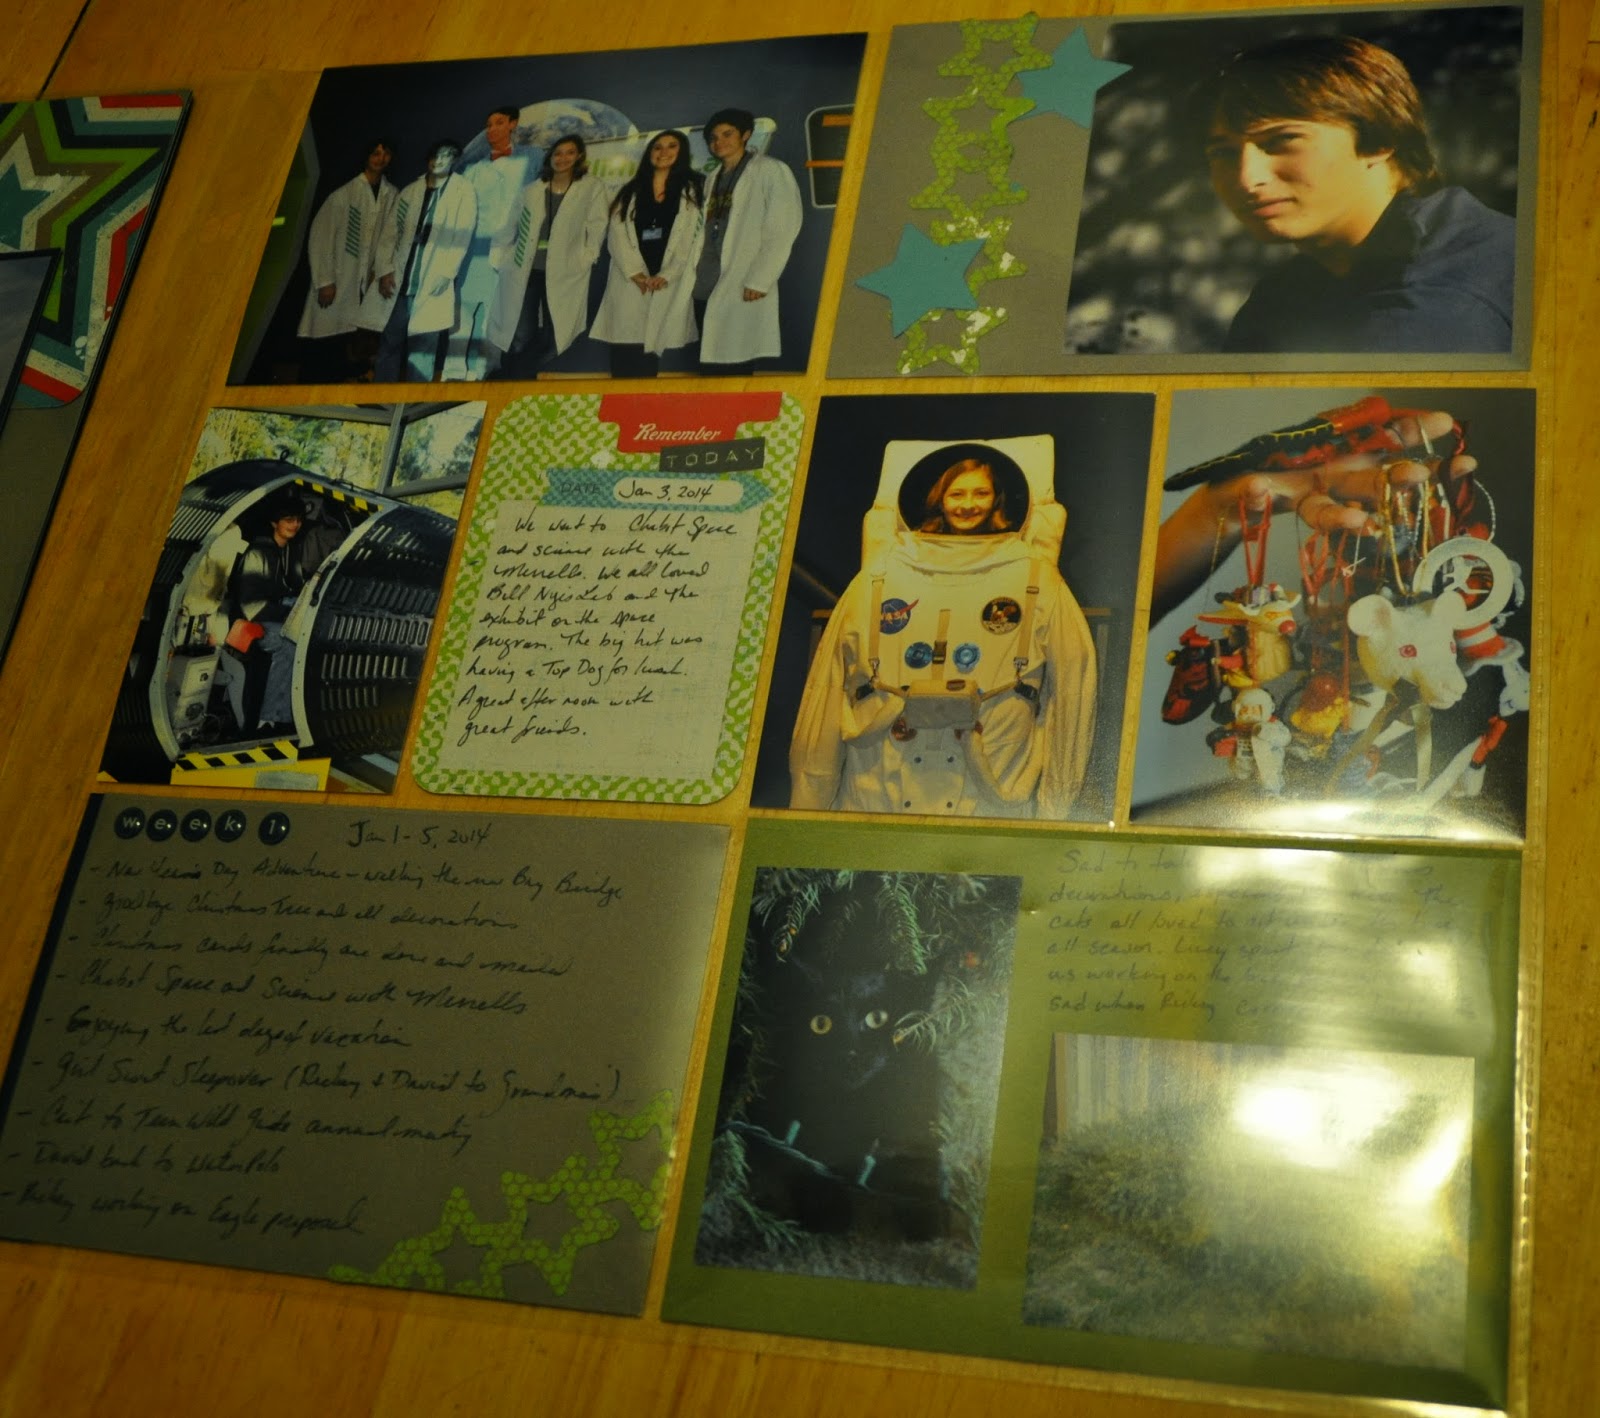
My next two pages are the highlights for week number one of 2014. On the left side, I used slate as a 12 x12 base and added in a couple of the cards from the pack. I also used the cricut and a little Later Sk8r paper that I had left over to embellish a bit more. The right side of the layout is done using Memory Protector design 4 which comes with the pack.
Sorry for the glare. It is really tough to take a decent picture with memory protectors on.
Here is an up close picture of one of the journalling cards in use.
The pack is filled with so many fun cards! I can't imagine using all of them. I am planning to make a few cards out of them as well.
Just one more way Close To My Heart is helping you have fun with paper. Give it a try today!
Sunday, February 2, 2014
Base and Bling
The new Base and Bling line in Close To My Heart is just gorgeous!


Here is my first project:
I used a sticker from the Craft Queen Style Sheet. Once the sticker is in the pendant, I added a drop of liquid glass and then added square glass cover. The completed pendant was put on the chain with a couple charms from the Craft Queen collection. Easy and lovely!
This sample was made by Lee-Anne Kilgour, another CTMH consultant. I saw this on a facebook post and thought Love It! This may be my next one. Lee-Anne used the Story Teller Style Sheet with the Story Teller charms set on the Antiqued Gold.
The base and bling can also be used with a little photo or a little work of art you might have. So much fun!
Saturday, February 1, 2014
New Idea Book Is Out!!

Take a look at all the new products available! Would you like an Idea Book of your own? You can order one on my online site using the item number WC1141. Or give me a call today.
Subscribe to:
Comments (Atom)