Learn how to make your own mini album using shapes cut with the Cricut Artiste Collection.
Thursday, February 21, 2013
Making a Mini Album With the Cricut
Learn how to make your own mini album using shapes cut with the Cricut Artiste Collection.


Tuesday, February 19, 2013
Digital Scrapbooking
Close To My Heart's Studio J is having a sale! Just $5 for a two page layout.
So, I decided to take advantage of the sale and get caught up on some pictures.


I take a lot of pictures. I document every event it seems. So I am always behind on my scrapbooks-- which is just fine. I don't let myself get upset over it, and I don't feel like a failure because of it.
Even though I love to play with paper and I love ink all over my fingers, sometimes I need to get a few pages done quickly. That's when I turn to digital scrapbooking. Working with Studio J, I can finish 3 layouts in less than an hour. And I am able to get a lot of pictures on one layout. I do have the digital layouts in the same album as my regular paper layouts. My scrapbooking friends notice. After all, scrapbooking friends are looking at what I am doing and seeing how to copy- the same way I look at their albums. However, most people don't notice there is a difference.
Studio J is perfect to get pages done quickly without the guilt. It is also great for those who really don't want to play with paper (I never understand those people). Some people just need to get the pictures out of their computer and have it done. We all need a little quick projects at times.
Check out Studio J. Play with the program a little. With the sale going on until March 15, it is a great time to give Studio J a try.
Friday, February 15, 2013
Bumble Bee Cards
Yesterday, I put together two cards using the same products with different results.


To get the multi-color effect on the stamped image, I inked the image with honey ink. Then I used daubers to ink the other colors. I used one dauber for sunset ink on the bee and another for cocoa ink around the stamp. When using a dauber, you are able to show multiple colors on one stamp. It is a nice look and very easy. Before stamping, I gave the stamp a hot breath to revive the inks. The image came out perfect. The important thing to remember when using multiple inks is to start with the lightest color and work toward the darkest. If I had started with the cocoa, we would never have seen the honey.
I used my daubers to ink the edges of the paper-- mostly in cocoa but also added a touch of the sunset.

Daubers are a great tool to have on hand while you are stamping. Plus a set of three is only $3.95. I have two sets that I keep with my sponges in a baggy. Each night when I am done with crafting, I wash the ink out and let them dry overnight. Then they are ready for my next day of crafting. A friend of mine has one for each color, with each dauber labeled with the ink color, keeping them in a case all together. She doesn't want to worry about mixing colors. Both ways work just fine. Find the way that works for you.
Both cards use the Buzz and Bumble paper pack and the Quick Cards- Bumble Bee stamp. The lower one I added some burlap ribbon. Which card do you like best? I love burlap ribbon and am always trying to add it somewhere so I was sure I would like that one better. But surprisingly, the top card without the ribbon is my favorite. After taking the picture, that card was signed and put in the mail to a dear friend who is battling cancer. I hope it cheers her up as much as it cheered me by making it.
Have fun with paper today!
Wednesday, February 13, 2013
Easter Layout using Chantilly
I guess I am ready for it to warm up a bit. I started looking at Easter photos from years ago. I mean really old photos. I only had two children when these photos were taken. That little girl in these photos is now 16 and learning to drive.


The Chantilly Workshop on the Go Scrapbooking kit was perfect for these pictures. Very springy. Everything except the ink is included in the kit--paper, stamp set, jewels, buttons, and instructions. Just follow the guide and all done. Easy.
Have fun with paper today!


The Chantilly Workshop on the Go Scrapbooking kit was perfect for these pictures. Very springy. Everything except the ink is included in the kit--paper, stamp set, jewels, buttons, and instructions. Just follow the guide and all done. Easy.
Have fun with paper today!
Friday, February 8, 2013
Crazy for Cards Event!
Crazy for Cards!
Time to get your
card stash all stocked up! Never
have a card ready when you need it? Not after this class!! Plus, you’ll even learn a couple of card
making tricks while you’re at it. Be
prepared for any occasion after you leave this event. You’ll make a total of 15 cards with envelopes
for birthdays, weddings, sympathy, babies, graduation and thank yous.
Date: Saturday, March
23
Time: 11:00 am – 5:00
pm
Cost: $45 (bring
favorite adhesive; all other supplies + snacks & lunch included)
RSVP & Prepay by: March 2
Location: Sunnyvale, near 101 & 237
**Cancellation Policy–you have 48 hours after payment for a full
refund up until the RSVP deadline; after this time, you have the option of a
kit OR to sell your spot to a friend.**
Thursday, February 7, 2013
Jeanette Lynton's Layouts
I was very excited to see this post by Jeanette Lynton, founder of Close To My Heart. She does beautiful artwork. This post features a layout for each of the new paper packs in the new Idea Book. My favorite paper packs are Buzz and Bumble and Tommy with which Jeanette has done some lovely layouts. But she has also shown how each paper pack is amazing. I can't wait to use each one of these papers. Be sure to check out Jeanette's blog for more ideas. Here is Jeanette's post about the new papers. Hope it gives you some ideas to have fun with paper today.
Jeanette:
At the beginning of a new Idea Book, I love to share some artwork to show off each of the newest My Reflections kits. These beautiful layouts will give you a taste of each of the kits in the Spring Summer 2013 Idea Book, as well as their complementary accessories. The artwork below shows you just what you can do using the Complements, whether it is a My Stickease assortment like those designed to accompany Later Sk8r, Buzz and Bumble, and For Always, or the Canvas Shapes that you can get with Claire and Tommy, or else the colorful chipboard shapes designed to accompany Chantilly. Each of the complements collections gives great titling options, icon elements, great borders, and a foolproof way to embellish your artwork your way. Have a look at the ideas below to help get your creative wheels turning.
Chantilly


Delicious springtime colors and plenty of floral textures and patterns.
Buzz and Bumble


Rich neutrals, splashes of Sunset and Crème Brulee, honeycomb patterns, and, yep, bees!
Claire


Lots of spunky fun to be had here, with versatile patterns and playful color combinations.
For Always


Classic black and white elegance, elaborate laces and damasks to commemorate the most cherished occasions and memories.
Later Sk8r
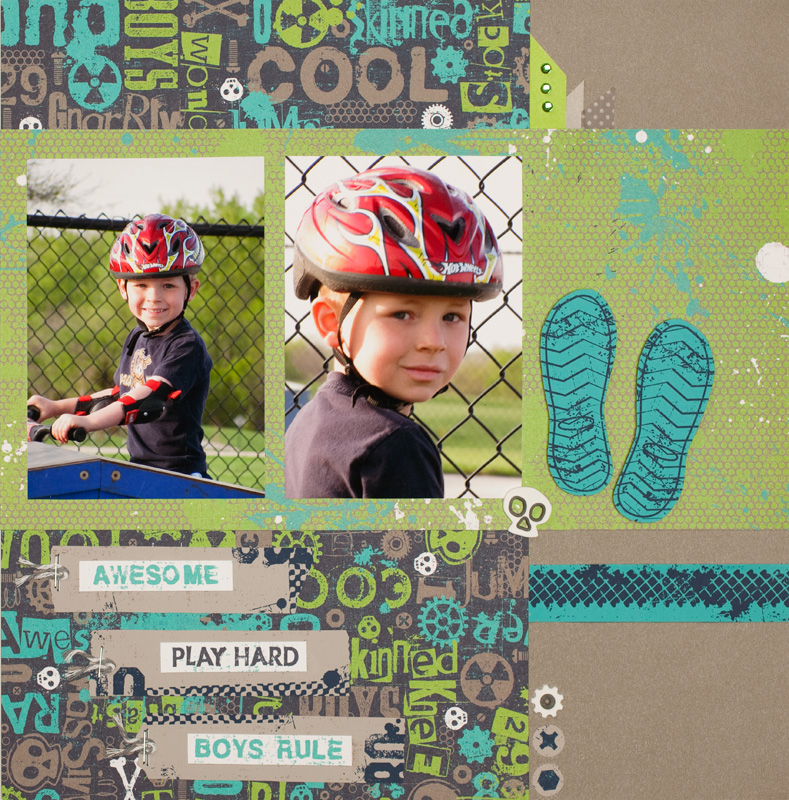

Hip, toxic colors with a strong slate neutral help celebrate your favorite little tough guy.
Surf’s Up


Perfect for a day in the sun with rich bold colors and fun retro elements.
Tommy


Adventurous blues and yellow with strong nautical themes ideal for your life’s adventures.
Wednesday, February 6, 2013
Muslin Gift Bags
What a great idea. I have this stamp set. I just need to grab some bags and try it out. Looking forward to playing with this.
Subscribe to:
Posts (Atom)