Take a look at this video which demonstrates this month's stamp of the month.
Wednesday, July 9, 2014
New Stamp of the Month!
Take a look at this video which demonstrates this month's stamp of the month.


Tuesday, May 6, 2014
Stamp a Stack

Are you ready to get a lot of cards made at once? Let me show you how to put together 16 cards using just a few sheets of paper.
Start with 3 sheets of paper. A two sided piece of pattern paper and two pieces of coordinating cardstock. I used the Skylark paper pack-- Skylark paper, lagoon, and colonial white. You will also need 16 card bases. Instead of cutting your own, use the colonial white value pack.
Now it is time to cut!

Very important to pay attention to the dimensions. I start with a cut straight down at 5 1/2 inches. Set up eight piles on your table. Put all the 1's together, all the 2's, and so on.

I used lagoon for my dark cardstock. Again my first cut was down the page at the 5 1/2 inches mark.
One thing that I noticed using this template several times-- if I didn't cut it exactly as directed, I was able to make it work. I just changed the card slightly and everything looked great. It really isn't an exact science.
Now we are ready to put it all together. I used 4 stamp sets:
Love Life
Joyful Birthday
Big Hug
Funky Blossom
You can use any stamp sets that you have on hand. You need a few sentiments and a few icons.
Besides the paper, card bases, and ink, I also used Lagoon Ink, a sponge, and 3-D foam tape.
Time for the cards!

Patterned paper (PP) 2" x 5 1/2", 1/4" x 5 1/2"
Dark Cardstock (D) 2 1/2" x 5 1/2"
Light Cardstock (L) 2' x 1 1/4"
Tear the larger piece of patterned paper. Use the sponge to ink all the edges. Of course, inking edges is a personal choice. Some people hate it. Some love it. For me, it depends on my mood.
Each card will be made twice. I turned the Skylark paper over and then changed the stamp used so that I ended up with 2 different cards for each.

PP 5 1/4" x 2, 4 1/4" x1 1/4"
D 5 1/4" x 2, 4 1/4" x1 1/4"
L 3 1/2" x 2"
I think this is my favorite of the pack. I do tend to like a lot of paper so the card with the most paper will of course be my favorite.

Card 3
PP 5 1/2" x 1 1/2"
D 5 1/2" x 1/2", 2 3/4" x 2"
L 2 1/4" x 1 1/2"

Card 4
PP 1" x 5 1/2"
D 1/2" x 5 1/2", 2" x 2"
Here is where you will use the extra light colored cardstock to create an embellishment. Or you can always use something out of your stash.
I stamped the star, cut it out, and used 3-D foam tape to pop it up.
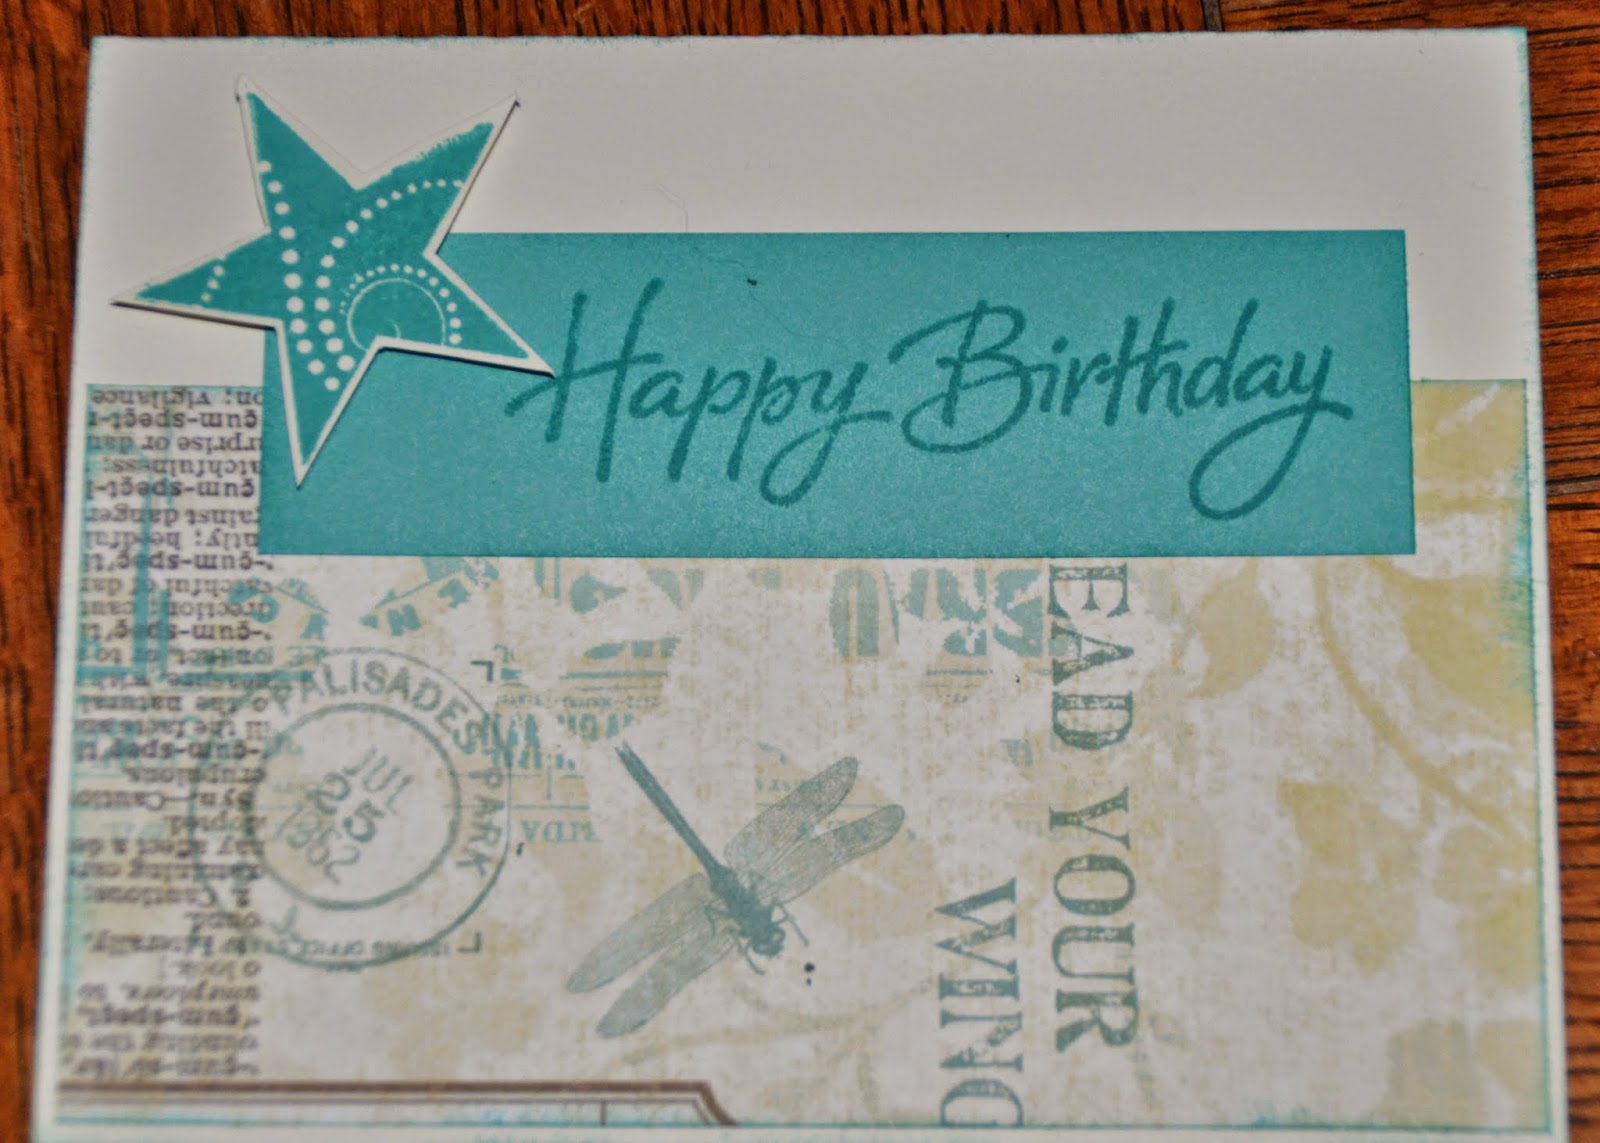
Card 5
PP 2 1/4" x 5 1/4" (note that this page doesn't go all the way to the edge of the card)
D 1 1/4" x 4 1/4"
And add another embellishment

Card 6
PP 1/2" x 4 1/4"
D 3" x 2 3/4"
Embellishment

Card 7
PP 2" x 4 1/4"
D 3 1/2" x 2 1/4", 1/4" x 4 1/4"
L 2 3/4" x 1 3/4"

Card 8
PP 2 1/2" x 1 1/4" (this stripe looks like a different piece but it is the little stripe on the Skylark paper-- it just happened to be that little piece)
D 2" x 1 1/4"
L 1/2" x 5 1/2" (Since this is a Colonial White strip on a Colonial White card base, I sponged it with a little lagoon ink and then put a pattern on it.
Embellishment
You can always add more accents -- a little bling here and some shimmer trim there. Maybe a ribbon or two.
This program is from the Wishes Card Confidence Program. It takes a few minutes to figure out the cuts, but after doing it once, you will be able to pick it up again quickly. You can use any paper and any set of stamps. Give it a try and have some fun with paper today!
Tuesday, April 15, 2014
Artbooking Made Easy
Here's the latest video on Artbooking. The whole series gives great ideas for paper crafting. This one is no exception.
Plus this month you can get the Artbooking Cricut Collection for FREE. Just sign up as a CTMH consultant and receive Artbooking, Artiste, or Art Philosophy Cricut Collections as a bonus.

For just $99 plus tax and shipping, you will receive over $400 worth of products with this bonus. Go to my website to sign up or for more details.
Saturday, April 5, 2014
Easel Card

This card looks fancy and complicated to make but is actually very easy to make. The base of the card is 12 inches by 4 inches. Then I scored the paper at 4 inches, 6 and 8.

Fold the card so that it forms an "M." That's the base. See-- very easy.
The butterfly on top of the card is cut with the Art Philosophy Cricut Cartridge. I used Ivy Lane paper on this card. I cut the butterfly at 2 1/2 inches. A solid butterfly glued to the the base paper. Then the butterfly with a decorative layer is adhered just at the center. Fold up the wings slightly so it looks like it is in flight.

The sentiment as the bottom needs to be popped up with 3-D foam tape. That acts as a dam to hold the card up.

I have made this card with several different papers. It just works with everything. Above is Lollydoodle Paper and below is Skylark Paper. The sentiment is from the Sincere Expressions stamp set.

Thursday, April 3, 2014
Stepping Out with Mojo Monday

I have been looking at challenge blogs lately in an attempt to give me a little more variety in my card making. I need to step out of my comfort zone a little more. This week, I took a look at Mojo Monday (mojo339). This week's challenge is to make a card that is tall and skinny. So here it is! This card is 6 inches by 3 1/2 inches. It was really easy to make. I just cut my kraft card stock at 12 by 3 1/2-- that's just one cut! Then I scored it at 6 inches.
The paper is from the Lollydoodle paper pack and the stamp set is this month's stamp of the month-- Balloon Talk. What a wonderful set this is.

Now it is your turn. Try something outside your comfort zone today.
Wednesday, April 2, 2014
Ivy Lane Cards
I don't usually do well with pinks and purples. I am a blue and green girl. But my last few classes have been with pinks and purples. So, I had to step outside my comfort zone a little. That is always a good thing since we do tend to get bogged down doing the same thing over and over. I had a hostess ask for Ivy Lane Paper and I wanted to take part in a color challenge. Here I go:
A few weeks ago, I saw a post by Pam Jarrett using the embossing folder to make a flower. I had to make that flower! I was so excited, I just couldn't wait to make a flower like that. So while designing my Ivy Lane class, I attempted the flower using Hollyhock paper. And I am really happy with the result.


A few weeks ago, I saw a post by Pam Jarrett using the embossing folder to make a flower. I had to make that flower! I was so excited, I just couldn't wait to make a flower like that. So while designing my Ivy Lane class, I attempted the flower using Hollyhock paper. And I am really happy with the result.
I used the Art Philosophy cartridge to cut three different sized flowers. Then embossed two using CTMH's dot embossing folder. I creased the petals to give it dimension and added 3-D foam tape in between each flower. Love how it came out.
This card was our experiment with color card. I cut up the Ivy Lane paper into pieces and let my class go to town creating a card. I have to admit that I cut them all so they would fit together like I have above. But the class didn't keep it simple. None of the four ladies stuck to this layout. They moved everything around and had a great time playing with their paper.
I used the colonial white value pack card as a base to this card. But I swiped the card with blush pigment ink. I like the look of the background- as if I used paint.
I'm entering both of these cards in the Color My Heart: Color Dare (Color Dare #87). Always fun to have a challenge! Check out the Color Dare and take the challenge. Do a little something outside your comfort zone and see where it takes you.
Tuesday, April 1, 2014
FREE Cricut Collection!
Have you been eyeing one of the Close To My Heart Cricut Collections?
These are amazing Cricut cartridges! Over 700 images in each. Plus stamps and chipboard that coordinate with the cuts. So many ideas. So much inspiration! Once you start using one, it will never leave your machine.

Add in a $99 Cricut Collection. You will receive over $400 worth of products for just $99 plus tax and shipping. That is 75% off! Do it today. Start enjoying your products right away. Click here to begin.
 |
| Artbooking |
 |
| Artiste |
 |
| Art Philosophy |
This month, you can receive one of these collections for FREE! Just join Close To My Heart and you will receive the collection of your choice as a bonus. The Consultant Kit is jam packed with over $300 worth of products for just $99.
Add in a $99 Cricut Collection. You will receive over $400 worth of products for just $99 plus tax and shipping. That is 75% off! Do it today. Start enjoying your products right away. Click here to begin.
Subscribe to:
Posts (Atom)