Showing posts with label later sk8r paper. Show all posts

Monday, February 3, 2014

Picture My Life

Close To My Heart has a new scrapbooking system called Picture My Life. If you are a fan of the Project Life system, you are going to love the Picture My Life system.

Each system design comes with:

44 – 4" × 6" Cards (2 each of 22 designs)
78 – 3" × 4" Cards (3 each of 26 designs)
1 – 12" × 12" Designed Cover Sheet
10 – 12" × 12" Memory Protectors™ (various designs)

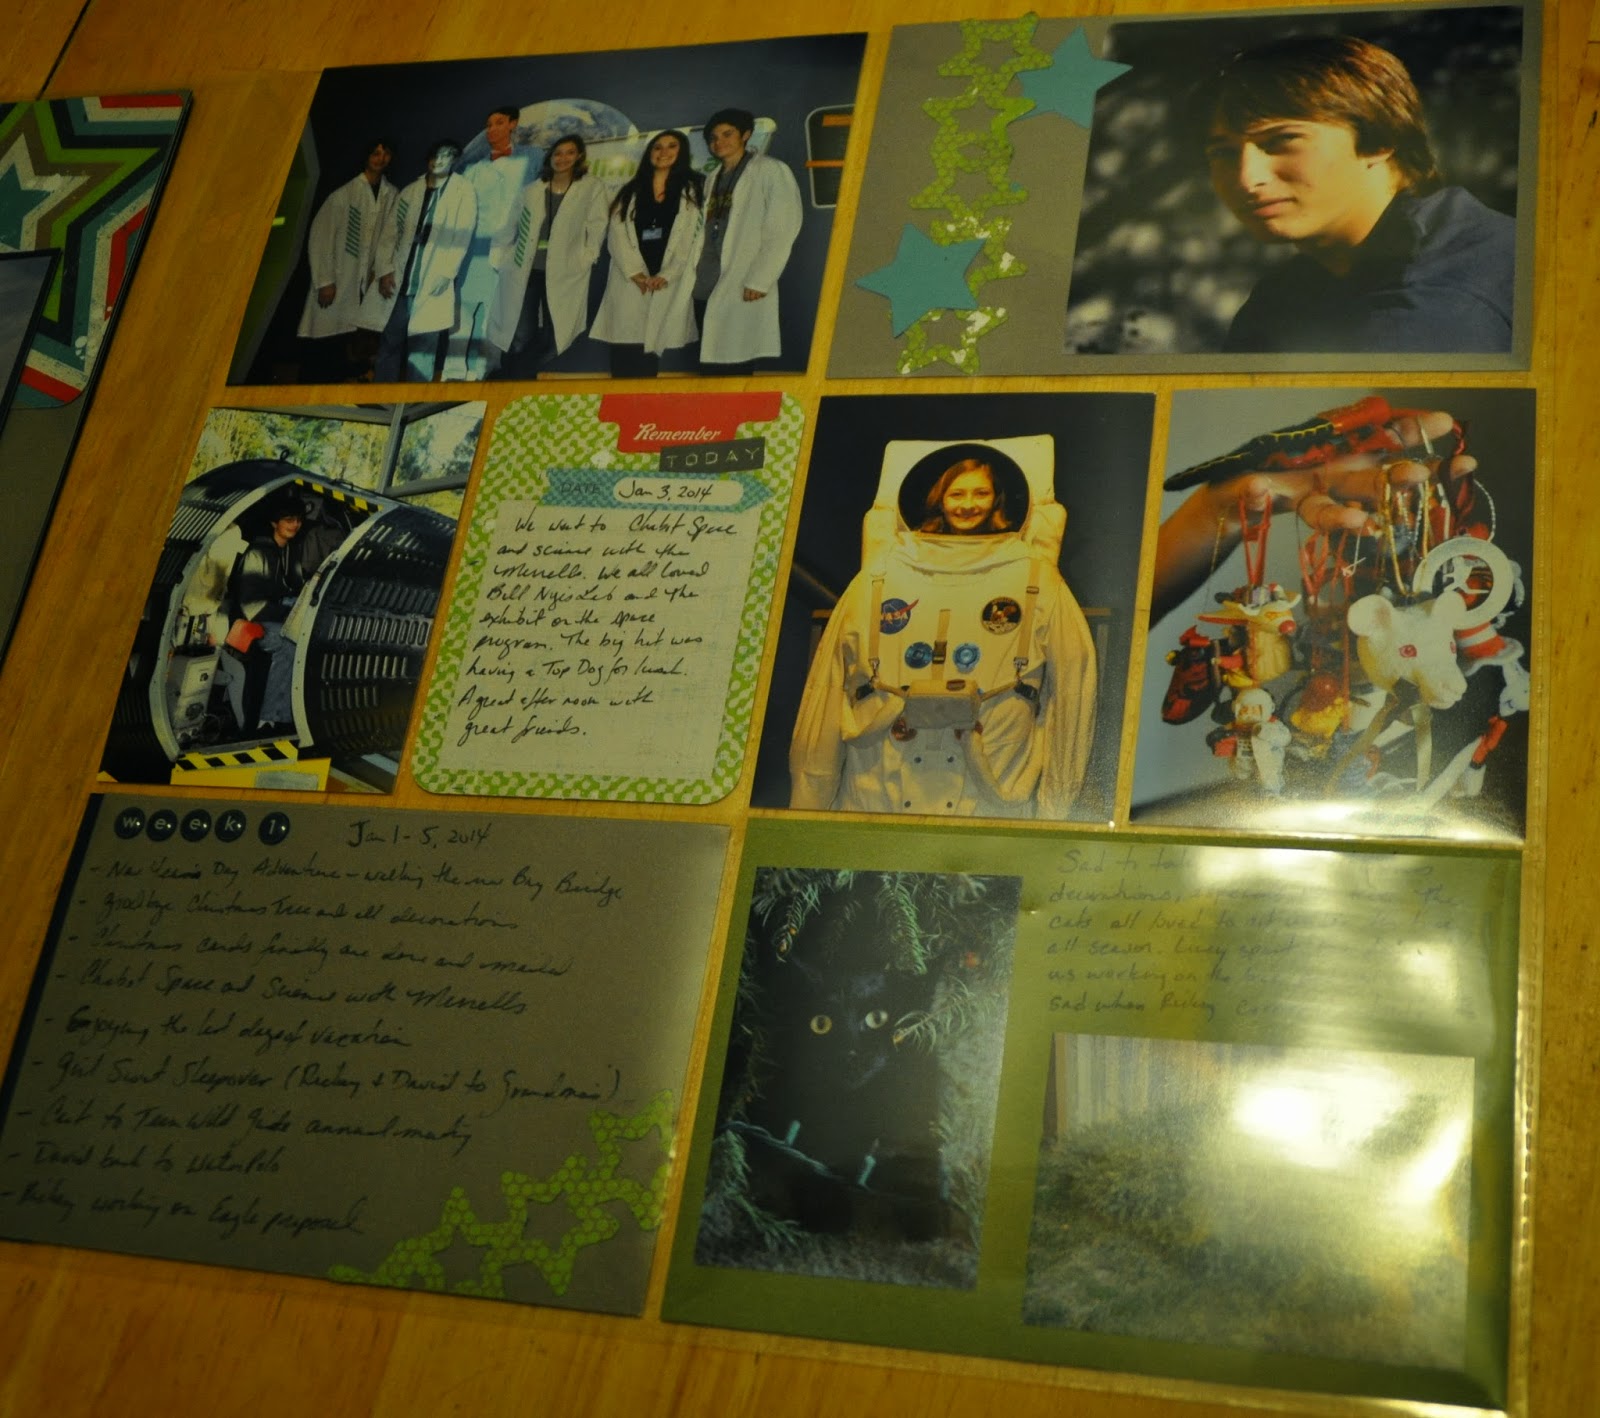
For the first page of my 2014 album I used the one 12x12 memory protector that comes in the pack (I have started with the Later Sk8r pack). I cut the Designed Cover Sheet and used a sheet of Outdoor Denim as a base.

My next two pages are the highlights for week number one of 2014. On the left side, I used slate as a 12 x12 base and added in a couple of the cards from the pack. I also used the cricut and  a little Later Sk8r paper that I had left over to embellish a bit more. The right side of the layout is done using Memory Protector design 4 which comes with the pack. 


 Sorry for the glare. It is really tough to take a decent picture with memory protectors on.


Here is an up close picture of one of the journalling cards in use.

The pack is filled with so many fun cards! I can't imagine using all of them. I am planning to make a few cards out of them as well.


Just one more way Close To My Heart is helping you have fun with paper. Give it a try today!

Wednesday, May 22, 2013

Zip Lining Layout Using Later Sk8r Paper

I take a lot of photos. I really mean A LOT of photos. I see layouts posted that are beautiful but they have just one photo on it. That will never work for me. I may have a special photo that I will showcase on its own but that is very rare. Plus I try to keep to my rule of no more than one page per day in the album. This keeps my albums down to two 12x12 albums per year. I do end up with a couple of mini books for special events but that's OK. They aren't part of the main family albums.

So, here's the challenge. Taking out a group, such as my Girl Scout Troop, do I highlight one good group photos? Do I take a few pictures that I really like? Or do I make sure everyone is included in the layout? This is the challenge I faced for the following layout.


I decided with including everyone in this layout. That's right- 15 pictures on one page. Luckily only six girls and one adult were zip lining that day. If all 15 Girl Scouts went on this trip, I never would have been able to do this. I must admit that I wasn't sure this was going to work. I had the idea in my mind, but sometimes I am just not able to transfer my ideas to paper. This time, I'm happy to report, it came out great. I was very pleased with the layout.

I have the group picture in the middle. Then I have a picture of each girl zip lining and a close up picture of her right after she landed. Everyone is showcased.

The group picture is a standard 4x6. The smaller photos were printed as wallets, cut down to size, and mounted on Daisy White paper. Each girl's portrait was then pop dotted up.

I use wallets a lot in my layouts. Basically I get more photos on a layout if I do. To order wallets on most sites, you end up with four of the same picture on a wallet sheet. There are a few sites that allow you to change the wallet sheets.The Costco Photo Organizer is a great tool that allows you to make a set of wallets from four different pictures. It also allows you to make smaller photos as well. It is the program I use but unfortunately, Costco no longer supports it so I can't find a link to give you this program.

Another site to get wallets is Fotofriend. The program allows you to design your wallet sheets and allows various sizes of pictures. I'm afraid I have not tried it out yet but have heard good things about it. If you try this site, please tell me your opinions.

Hope you are all working on my challenge of a page a day in the month of May!

Friday, March 29, 2013

More Cards From Crazy For Cards

Today I am posting 3 cards from my Crazy For Cards Event that were designed by Deanna Cave (http://craftswithdeanna.blogspot.com/).


This cute little fish is from the Under The Sea stamp set (item #C1500). Deanna used distressed Twilight paper for the background. She used a sandpaper block from the sanding kit (Z1294) to achieve the look. Some hemp and some liquid glass adds nice finishing touches to the card.


We are always looking for a masculine card, right? Well, here you go. The paper pack is Later Sk8r (X7167B) and the stamp set is Born To Ride (C1483). At Scrapbook Expo 2 weeks ago, this stamp set was very popular. I didn't realize how hard it is to find a motorcycle stamp.


And finally, we have a new baby card. Love this stamp set-- New Baby (C1541).

Cute set to use in cards or a baby book.

Deanna used Chantilly paper and finished the card with a little glitz and sparkles.

Be sure to hop over to my shop site and purchase the stamp set or paper you liked. Just click here.

I still have 6 more cards from Crazy For Cards to post. 3 more tomorrow.

Tonight, I am going to join my scrapbooking friends for and evening of paper crafting. I am going to work on cards for my card swap tomorrow, do another page on my picture of the week album, and then start on a few pages from my camp album. I'm looking forward to a great time laughing and creating with my friends. I hope you will be able to play with paper today!