Wednesday, October 31, 2012
Monday, October 29, 2012
A Very Merry Christmas- October Stamp of the Month
This great stamp set is available only for 2 more days. Make sure you place your order by October 31. This is a fun set. The Cricut Artiste coordinates with it and is perfect for your holiday cards.
Supplies:
A Very Merry Christmas Stamp Set (S1210)
Pear and Partridge Paper Pack (X7162B)
Cranberry Bakers Twine (Z1751)
Cranberry or Olive Ink
Bitty Sparkles (Z1263)
The ornament was cut using the Cricut Artiste.
Order your stamp set today before it is too late. Click here to place your online order.
Saturday, October 27, 2012
Ink It Up- More About Alcohol Markers
I posted a video about Close To My Heart's new alcohol markers earlier this month. Here is more information about them:
A lot of good info. Time to get ink all over my fingers as I play with my paper!
Thursday, October 25, 2012
Pumpkins!
I love pumpkins! I love fall colors! So I was very excited to be in charge of the Thanksgiving projects for last weekend's Holiday Extravaganza.
The So Grateful stamp set is perfect for Thanksgiving. I used it in two projects. The first one, I did a similar card as Close To My Heart put on the website shown above.
The pumpkin is stamped twice. I stamped the solid pumpkin in autumn terracotta on the 3x3 piece of bamboo paper. Then without re-inking. I stamped it again on another piece of bamboo. I then stamped the pumpkin with words in the same ink. The pumpkin (with words) is cut out and placed on top of the solid, darker pumpkin with 3-D foam tape to give it a raised look. The leaf and swirls were stamped in New England Ivy on the solid pumpkin piece.
Supplies:
So Grateful stamp set (B1395)
Papers: Flirty, New England Ivy, and Bamboo
Natural Hemp (Z280)
Antique Copper Designer Brads (Z1410)
My second project using the So Grateful stamp set was a box. I cut out the pieces of the box using the Cricut Artiste Cartridge. The 1 inch size makes a very nice size box. The box is found on the Mother's Day button on the Artiste Cartridge. It is very simple to cut out and put together. When making these 3-D objects, I always fold on the scored edges first. Then I ink up the edges. I usually like to decorate it before I glue the sides together. But with the box, I needed to put the box together to see which side is the top before adding the decoration.
The top is decorated using a piece of Flirty paper cut to match the top of the box. This was cut at 2 1/4 inch with the real size button pushed. If the real size is not on, the piece will be huge.
The pumpkin is stamped in the same manner as the card above. Stamp the solid pumpkin on a piece of scratch paper first. Then, without re-inking, stamp the pumpkin on a piece of Colonial White paper. Next stamp on the words. The stem and leaf are stamped with Olive ink. I kept the stem attached to the pumpkin but the leaf was cut out separately.
Supplies:
Papers: Flirty, Saddle, Olive, Colonial White
So Grateful Stamp Set (B1395)
Burlap Ribbon (Z1760)
Chocolate Waxy Flax (Z1088)
It is amazing how easy boxes like these can be to make. If you have the Cricut Artiste, you can use any supplies on hand to quickly make a small gift box or bag and not go out to the store and spend $10 on one. Give it a try. Make a box or two and see how you like it. You will be amazed with the results.
The So Grateful stamp set is perfect for Thanksgiving. I used it in two projects. The first one, I did a similar card as Close To My Heart put on the website shown above.
The pumpkin is stamped twice. I stamped the solid pumpkin in autumn terracotta on the 3x3 piece of bamboo paper. Then without re-inking. I stamped it again on another piece of bamboo. I then stamped the pumpkin with words in the same ink. The pumpkin (with words) is cut out and placed on top of the solid, darker pumpkin with 3-D foam tape to give it a raised look. The leaf and swirls were stamped in New England Ivy on the solid pumpkin piece.
Supplies:
So Grateful stamp set (B1395)
Papers: Flirty, New England Ivy, and Bamboo
Natural Hemp (Z280)
Antique Copper Designer Brads (Z1410)
My second project using the So Grateful stamp set was a box. I cut out the pieces of the box using the Cricut Artiste Cartridge. The 1 inch size makes a very nice size box. The box is found on the Mother's Day button on the Artiste Cartridge. It is very simple to cut out and put together. When making these 3-D objects, I always fold on the scored edges first. Then I ink up the edges. I usually like to decorate it before I glue the sides together. But with the box, I needed to put the box together to see which side is the top before adding the decoration.
The top is decorated using a piece of Flirty paper cut to match the top of the box. This was cut at 2 1/4 inch with the real size button pushed. If the real size is not on, the piece will be huge.
The pumpkin is stamped in the same manner as the card above. Stamp the solid pumpkin on a piece of scratch paper first. Then, without re-inking, stamp the pumpkin on a piece of Colonial White paper. Next stamp on the words. The stem and leaf are stamped with Olive ink. I kept the stem attached to the pumpkin but the leaf was cut out separately.
Supplies:
Papers: Flirty, Saddle, Olive, Colonial White
So Grateful Stamp Set (B1395)
Burlap Ribbon (Z1760)
Chocolate Waxy Flax (Z1088)
It is amazing how easy boxes like these can be to make. If you have the Cricut Artiste, you can use any supplies on hand to quickly make a small gift box or bag and not go out to the store and spend $10 on one. Give it a try. Make a box or two and see how you like it. You will be amazed with the results.
Tuesday, October 23, 2012
Halloween Fun
This past Saturday, I was one of five Close To My Heart Independent Consultants hosting a Holiday Extravaganza. We offered 15 crafts for our guests to create. It was a lot of fun. What I really liked about it is each of us had a different style of crafting so we all learned something different.

I just love this bat card designed by Shawn. The card base is cut from the the Cricut Artiste Cartridge (see page 76 of the Artiste booklet). With a couple cuts from the Cricut and a few stamps, you have a quick and very cute card.
Supplies:
Moonlight Paper Pack (X7161B)
Creepy Creatures Stamp Set (C1522)
Sparkles - Red, Pink, and Purple Assortment (Z1326)
Cricut Artiste Collection (Z1790)
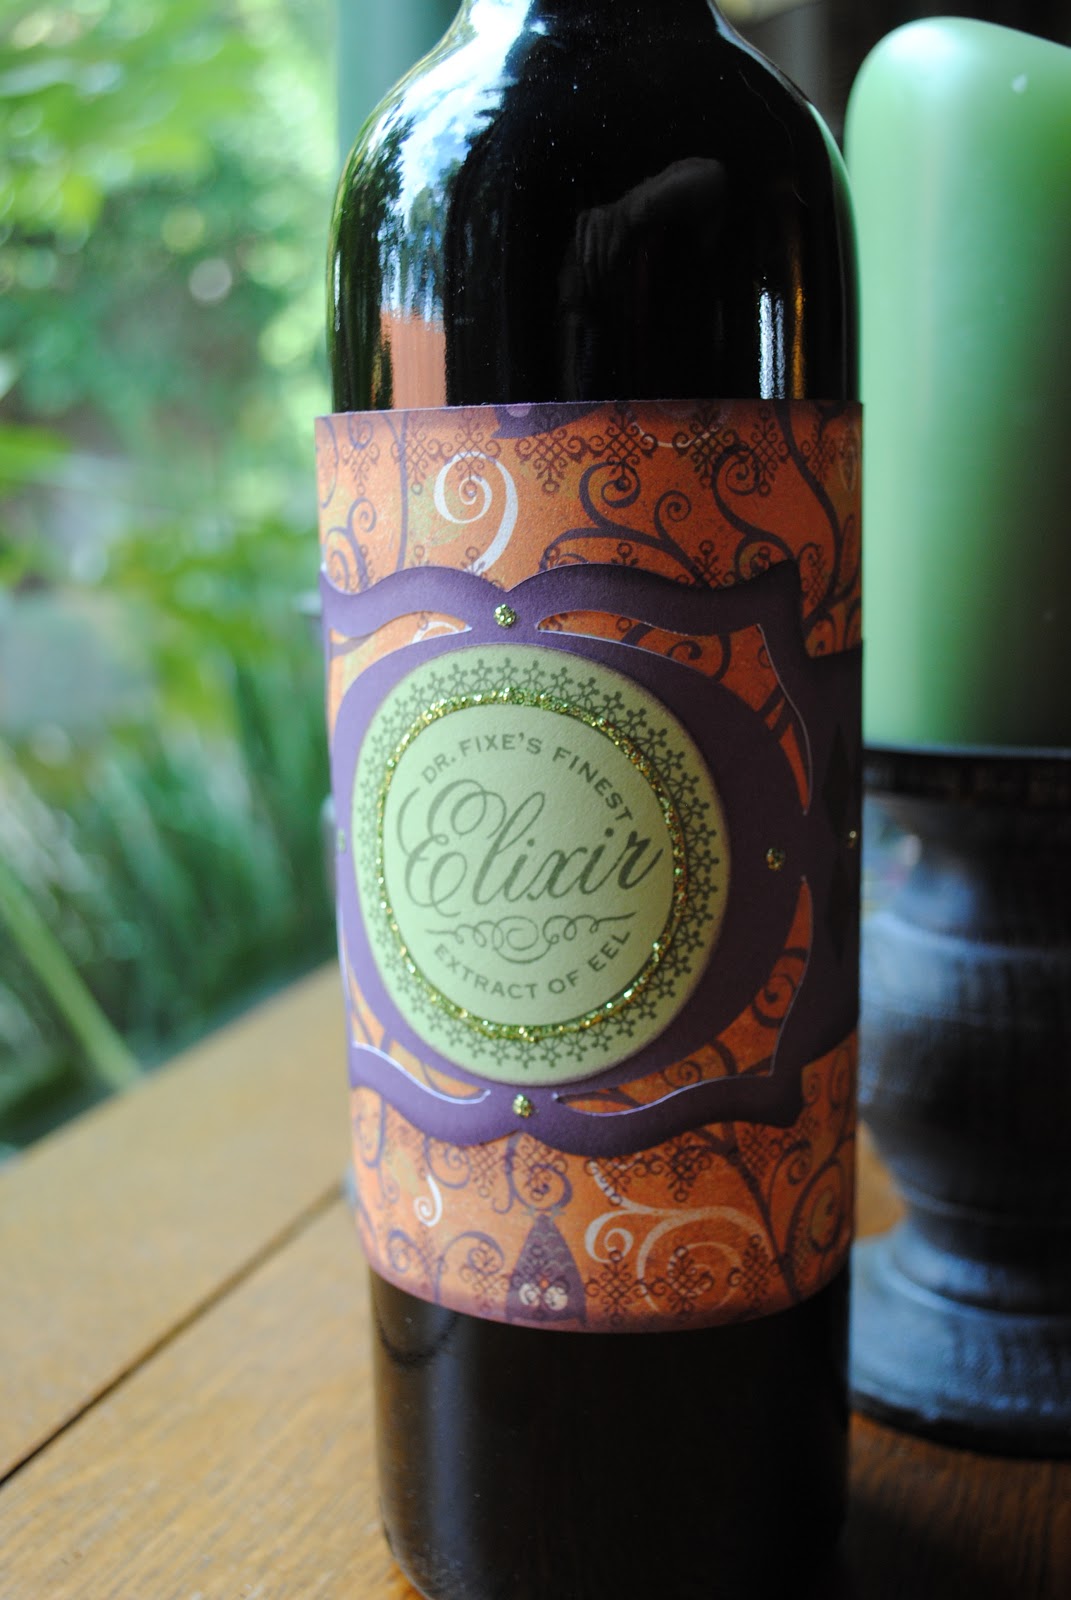
Shawn also designed a wine bottle label.
The label is 10 inches by 4 3/4 inches. How perfect is this for your Halloween party!
Supplies:
Moonlight Paper Pack (X7161B)
Magic Potions Stamp Set (C1509)
Glitz Glitter Gel- Green (Z1771)
Later this week, I will post the Thanksgiving crafts from the Holiday Extravaganza.
Have fun with paper today!
Saturday, October 20, 2012
Clearly The Best: Alcohol Marker Madness
Add a little something to your art with the alcohol-based marker sets.
Friday, October 19, 2012
Christmas Card Workshop Coming Soon
Ready to start making your Christmas cards? If you do a lot, like me, it's best to make them in November. Early December, you then are able to write your notes and mail them out, having more time for holiday fun.
With that in mind, I am starting Christmas card workshops just next week. I have one on October 28 and one on November 9. I'll be happy to bring the workshop to you if you would like to host a day for you and your friends. During the workshop, we will be making 15 cards- 3 each of 5 designs.
I have had a lot of fun playing with my paper, trying to decide which designs to use in the workshop. Close To My Heart offers so many holiday stamp sets and I love the Pear and Partridge paper pack. Plus using the Cricut allows for even more options. Time to get my fingers inky and figure out what I want to do.
Here is a card that I made as part of the Heart 2 Heart Challenge:
The base is a 6x6 kraft die cut card which gives you a different look to the card. When the card is opened, there is a large area for my family picture and Christmas letter. It was a quick card to make, thanks to the Artiste Cricut cartridge. The only disadvantage of sending this card out is that I will need extra postage since it is a square card. It is 65 cents to mail a square envelope. But since that is the only disadvantage, I have decided that this card is a yes for the workshop and probably a yes for my family cards.
Supplies:
Kraft Die Cut Cards (Z1474)
Pear and Partridge Paper Pack- using green print, cashmere, and cranberry (X7162B)
Merry and Bright Stamp Set (C1510)
Cranberry Ink (Z2116)
Red Sparkles (Z1326)
Cricut Artiste Collection (Z1790)
Have fun playing with paper today!
With that in mind, I am starting Christmas card workshops just next week. I have one on October 28 and one on November 9. I'll be happy to bring the workshop to you if you would like to host a day for you and your friends. During the workshop, we will be making 15 cards- 3 each of 5 designs.
I have had a lot of fun playing with my paper, trying to decide which designs to use in the workshop. Close To My Heart offers so many holiday stamp sets and I love the Pear and Partridge paper pack. Plus using the Cricut allows for even more options. Time to get my fingers inky and figure out what I want to do.
Here is a card that I made as part of the Heart 2 Heart Challenge:
The base is a 6x6 kraft die cut card which gives you a different look to the card. When the card is opened, there is a large area for my family picture and Christmas letter. It was a quick card to make, thanks to the Artiste Cricut cartridge. The only disadvantage of sending this card out is that I will need extra postage since it is a square card. It is 65 cents to mail a square envelope. But since that is the only disadvantage, I have decided that this card is a yes for the workshop and probably a yes for my family cards.
Supplies:
Kraft Die Cut Cards (Z1474)
Pear and Partridge Paper Pack- using green print, cashmere, and cranberry (X7162B)
Merry and Bright Stamp Set (C1510)
Cranberry Ink (Z2116)
Red Sparkles (Z1326)
Cricut Artiste Collection (Z1790)
Have fun playing with paper today!
Subscribe to:
Posts (Atom)